Knowledge Management
Enterprise Space Management
On the Enterprise Space Management page, administrators can maintain space types and manage the enterprise space support library.
Add Enterprise Space
Steps to add an enterprise space:
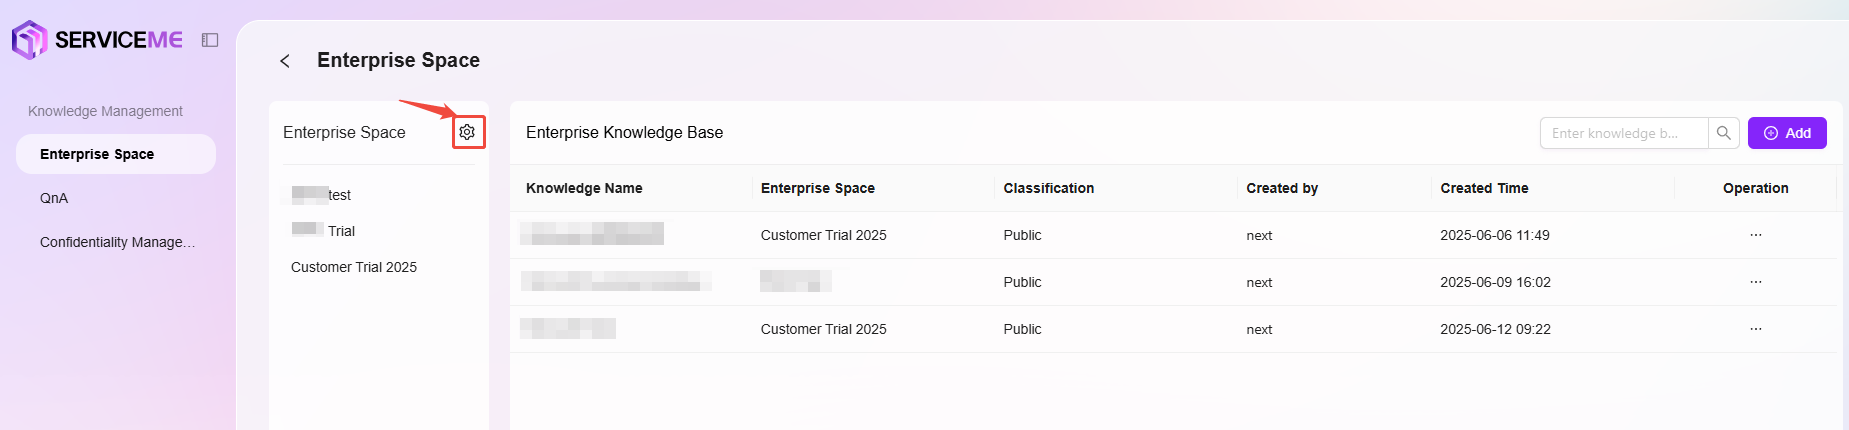
- Navigate to "Settings -> Knowledge Management -> Enterprise Space"
- Click the "⚙️" icon next to the enterprise space to enter the configuration page
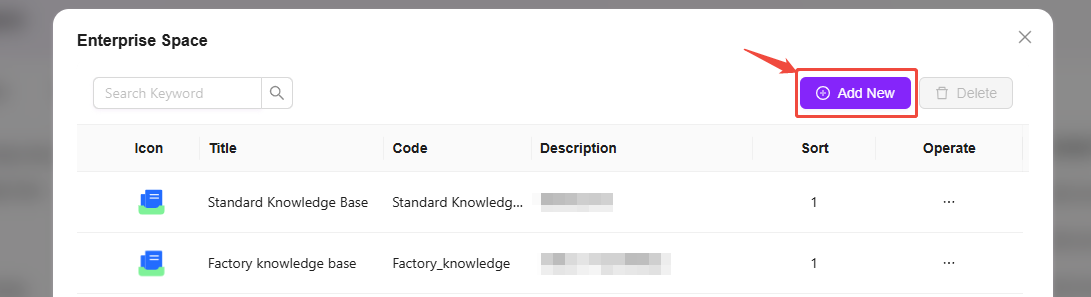
- Click the "Add" button on the right to open the Add Enterprise Space page
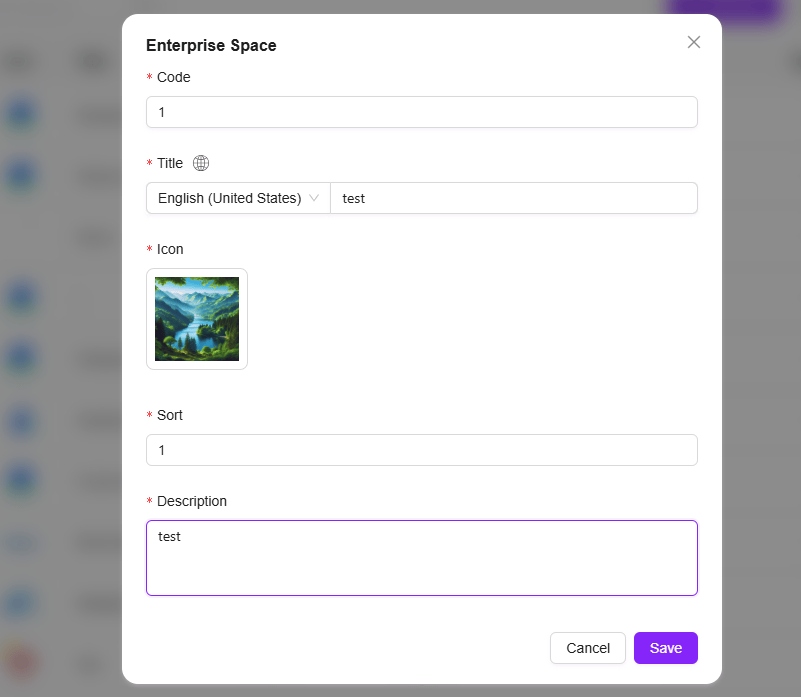
- Enter basic information for the new enterprise space, such as space name, icon, etc.
- Click "Save" to successfully add the enterprise space
Delete Enterprise Space
Deleting an enterprise space is similar to adding one. The steps are as follows:
- Navigate to "Settings -> Knowledge Management -> Enterprise Space"
- Click the "⚙️" icon next to the enterprise space to enter the configuration page
- Select the enterprise space to delete, then click the "···" icon
- Choose "Delete" and confirm the action to delete the enterprise space
- Deleting an enterprise space is irreversible; proceed with caution

Add Knowledge Base
Steps for administrators to add a knowledge base on the Enterprise Space Management page:
- First, navigate to "Settings -> Knowledge Management -> Enterprise Space" and enter the enterprise space where the new knowledge base will be created
- Click the "Add" button next to the knowledge base
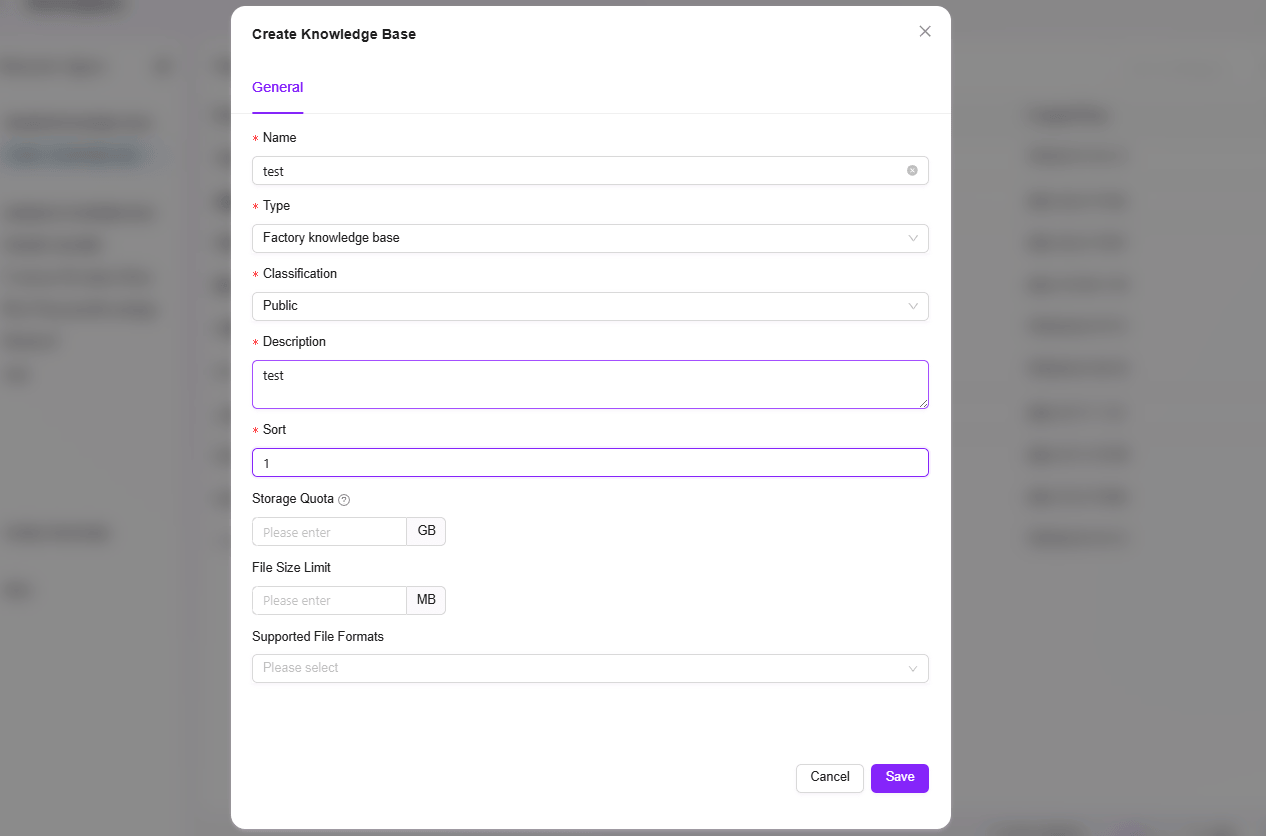
- On the pop-up Create Knowledge Base page, enter the name, Confidentiality, description, and other information, then click "Confirm" to successfully create the knowledge base
- Confidentiality: Default levels include public and Highly confidential
- Storage Quota: 0-1GB
- File Size Limit: Optional, default is no limit
- Supported File Formats: Optional, default supports all formats

Delete Knowledge Base
Steps for administrators to delete a knowledge base:
- Navigate to "Settings -> Knowledge Management -> Enterprise Space"
- Enter the enterprise space containing the knowledge base to be deleted, locate the knowledge base
- Click the "···" icon next to the knowledge base and select "Delete"
- Confirm the action to delete the knowledge base

QnA Management
QnAs submitted by administrators do not require approval and take effect immediately. All pending questions are automatically listed at the top for administrators to prioritize.
Review QnA
The QnA approval process ensures the accuracy and standardization of knowledge base content. This process primarily applies to questions and answers submitted by non-administrators, ensuring content is reviewed by administrators before being added to the QnA library for regular users to access. Content submitted by administrators takes effect immediately without review. All pending questions are automatically listed at the top for administrators to prioritize.
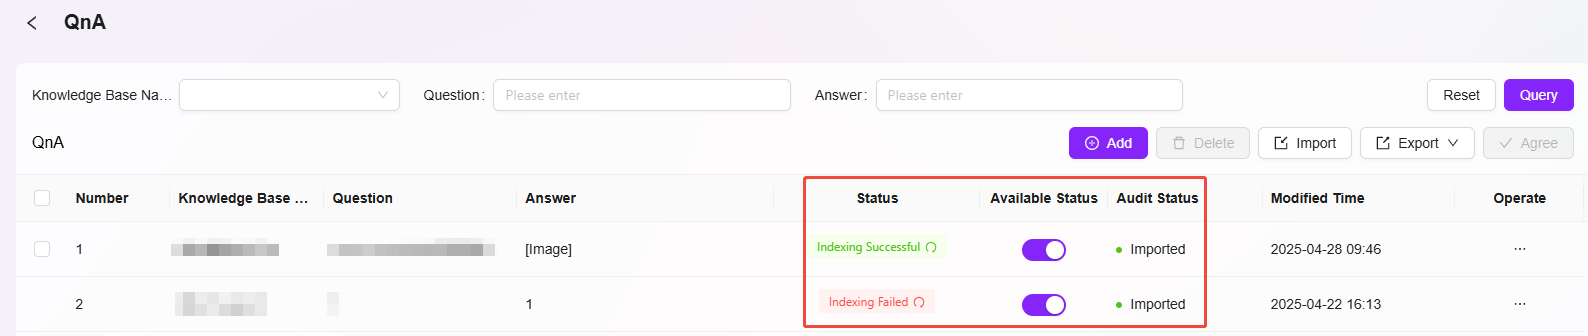
QnA Approval Status: Pending Review, Added to Library, Rejected
- Pending Review: Submitted questions and answers automatically enter the "Pending Review" status, awaiting administrator review and processing
- Added to Library: After administrator approval, questions and answers are added to the QnA library for regular users to access
- Rejected: If content does not meet standards, administrators can reject it. Rejected content will not be visible to regular users but will remain in the system for future review.
QnA Approval Actions: Approve, Reject, Batch Operations
- Approve: Administrators approve content that meets requirements, adding it to the QnA library. Approved QnAs cannot be rejected afterward.
- Reject: Administrators can reject content that does not meet standards.
- Batch Operations: Administrators can select multiple pending items for batch approval.

Import QnA
QnAs can be uploaded in two ways, one of which is importing QnAs. Importing supports batch uploads, suitable for large quantities of QnAs.
Steps to import QnAs:
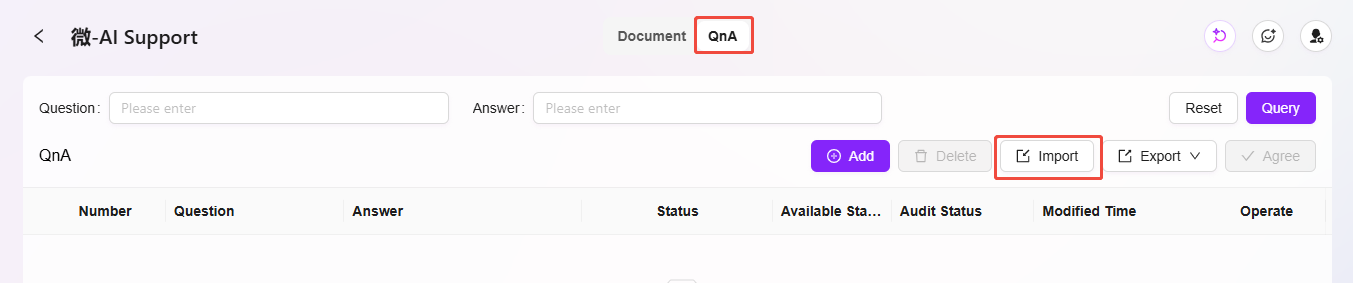
- Enter the enterprise space knowledge base and open the QnA interface
- Click the "Import" button on the right to open the import page
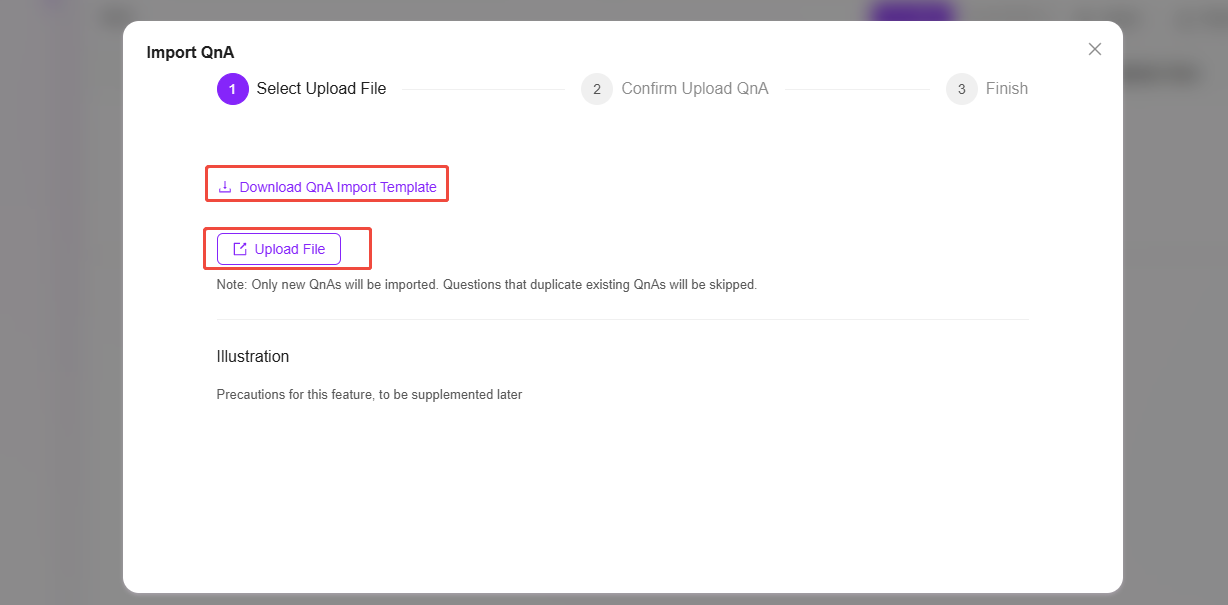
- Download the template file, fill in the template with enterprise space, questions, and answers (enterprise space refers to the knowledge base name under the enterprise space)
- After completing the template file, return to the import page, click "Upload File," and select the completed template file
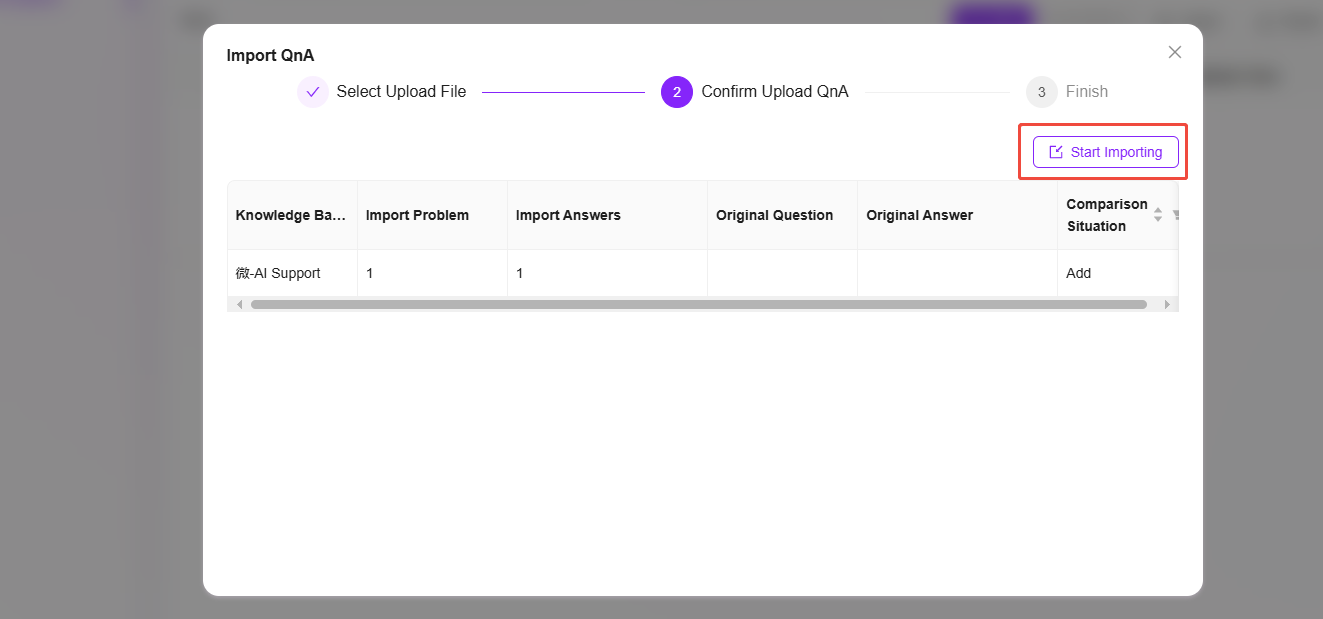
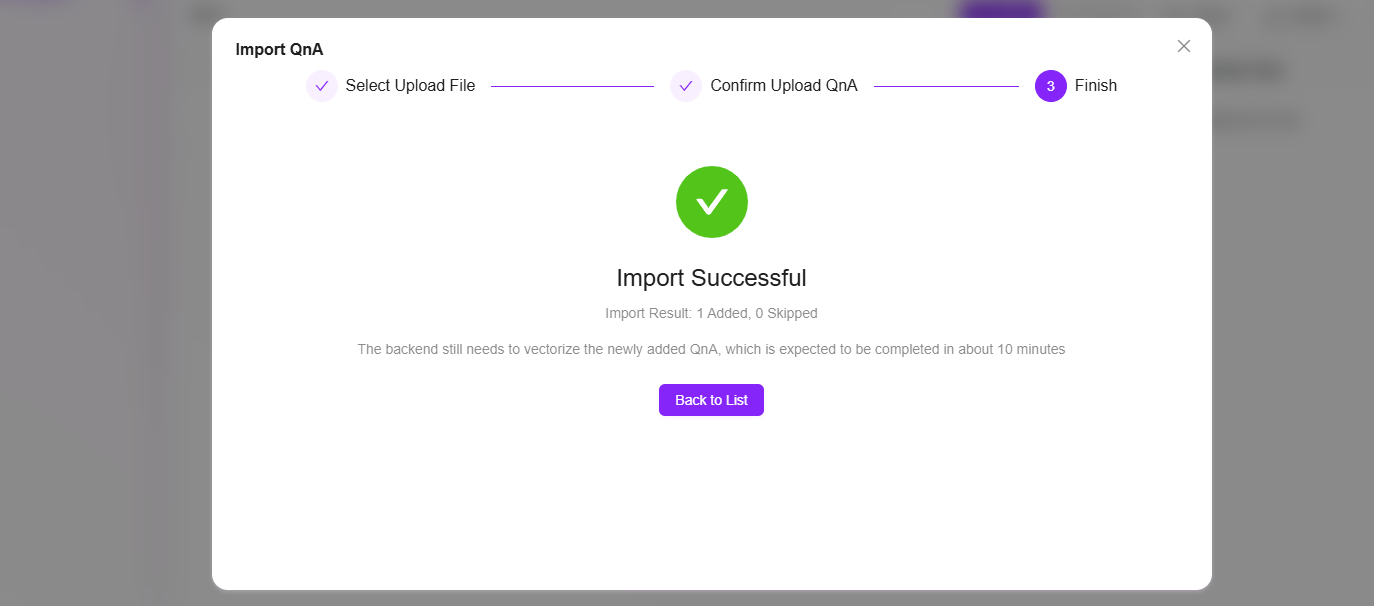
- File information will automatically preview; confirm accuracy and click "Start Import" on the right
- Wait for the process to complete, and a success message will appear
💡 Note: Only new QnAs are imported. Duplicate questions with existing QnAs will be skipped.

Add QnA
When adding a QnA, only one entry can be added at a time. Steps to add a QnA:
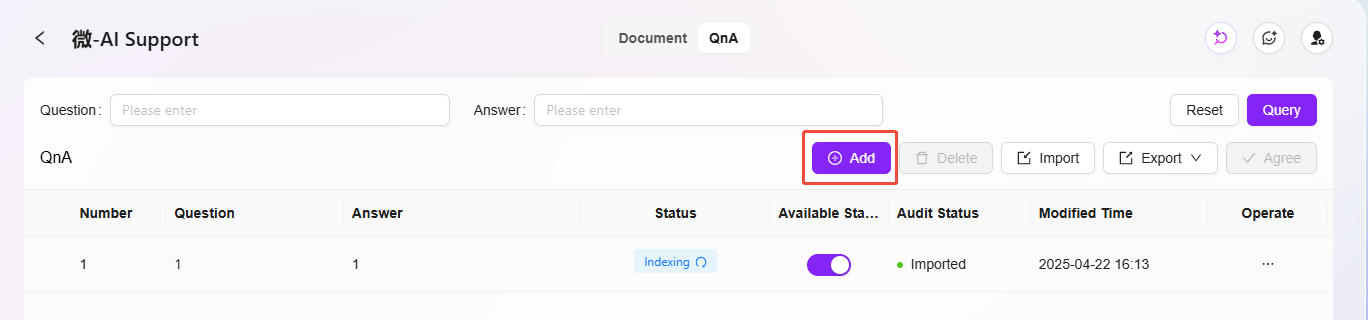
- Enter the enterprise space knowledge base and open the QnA interface
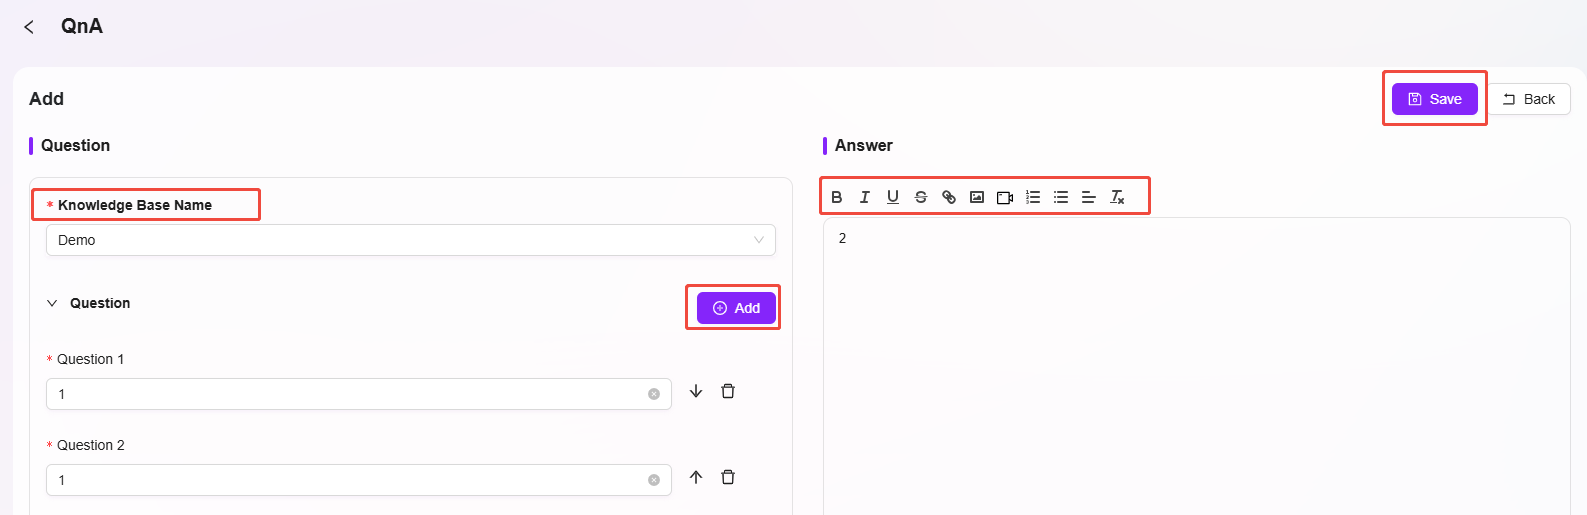
- Click the "Add" button on the right to open the Add page. The left side is for questions, and the right side is for answers
- On the question side, select the knowledge base name where the QnA belongs
- Click the "Add" button to add multiple questions
- On the answer side, input the answer, which supports text, links, images, videos, etc.
- After entering the questions and answers, click "Save" to successfully add the QnA
💡 Note: When adding multiple questions, all these questions will share the same answer entered on the right side.
Export QnA
Currently, QnAs can be exported. You can export the current page or all QnAs.

Confidentiality Management
Confidentiality management is a key mechanism for ensuring enterprise information security. Administrators can configure Confidentialitys to safeguard enterprise information.
Add Confidentiality
Administrators can add new Confidentialitys. Steps to add a Confidentiality:
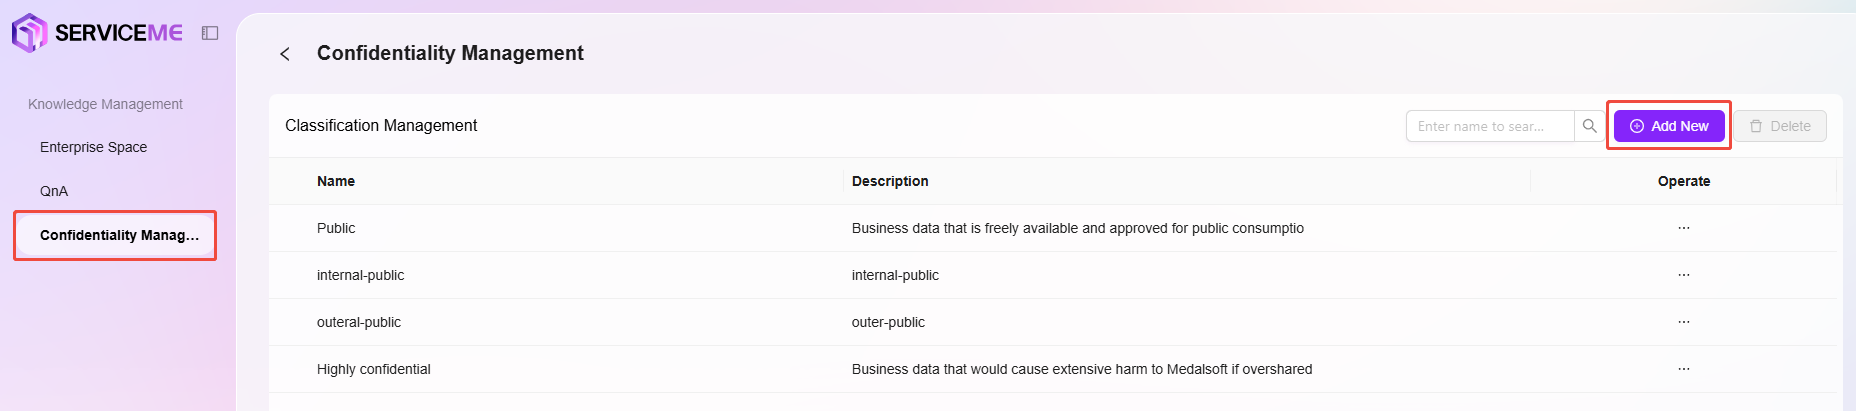
- Navigate to "Settings -> Knowledge Management -> Confidentiality Management"
- Click the "Add" button on the right
- Enter the name and description of the new Confidentiality, and select the permissions associated with the level
- Click "Save" to successfully create the new Confidentiality

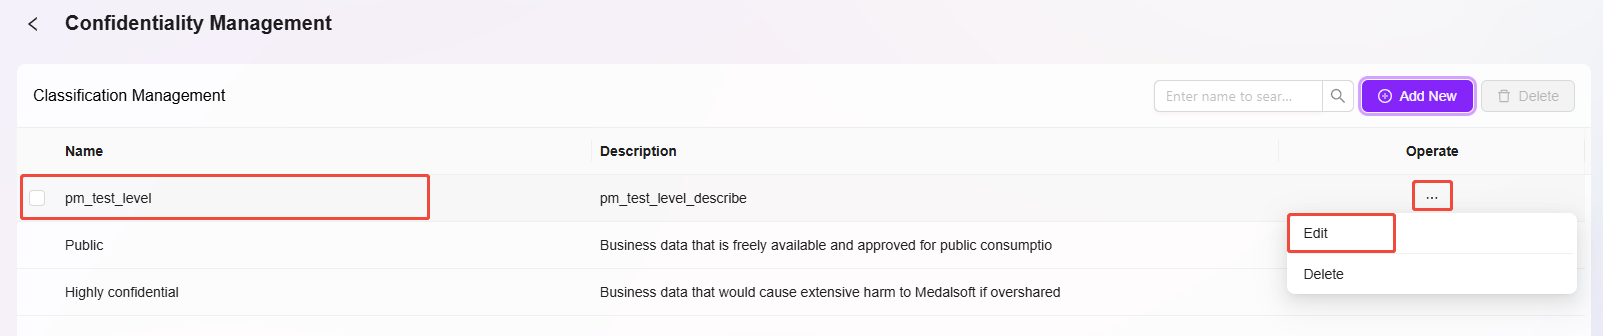
Edit Confidentiality
Administrators can edit the name, description, and permissions of a Confidentiality.
Steps to edit a Confidentiality:
- Select the Confidentiality to edit, then click the "···" icon on the right
- Choose "Edit" to enter the edit page and make changes
- Click "Save" after completing the edits
Delete Confidentiality
Deleting a Confidentiality follows a similar process to editing:
- Select the Confidentiality to delete, then click the "···" icon on the right
- Choose "Delete" and confirm the action to delete the level
